Lina's tiny house

Tiny For Two (T42) Photos

Tiny For Two (T42) Photos

Yesterday was Beltane (AKA May Day) and it marked the one year anniversary of starting the build for our new tiny house, T42. To celebrate, we want to share photos with you! In mid-March, Kristina of Kristina Lynn Photography came to do a photo shoot. As I've hinted at in my Niche Newsletters, Kristina is a photographer who especially loves taking photos of people in their homes and recently she's become intrigued by tiny house dwellers. So it was an awesome opportunity to have her come shoot our little house. She captured some truly fabulous shots and we're excited to share them with you!

Lina's Tiny House: The Lucky Penny

For those of you new to The Little Life, welcome! My name is Lina Menard and I live in a tiny house called The Lucky Penny. I designed and built the Lucky Penny in 2014. Thanks go to Guillaume for this photo of me and my tiny house, The Lucky Penny.

This profile will introduce you to my lil' house. If you'd like to see more photos and articles about my house, read Lucky Penny's Public Debut. If you have questions, please be sure to take a peek at my Frequently Asked Questions and if your question isn't addressed there, please contact me. If you want to see a video tour, please check out the Lucky Penny Tiny House Tour by Jenna and Guillaume of Tiny House Giant Journey. You can also check out other posts about The Lucky Penny on my blog.

Fast Facts

  • Name: The Lucky Penny
  • Location: Simply Home Community in Portland, OR
  • Location Type: Tiny Cohousing Community (three tiny houses act as detached bedrooms in the backyard of a single-family home)
  • Setting: Urban
  • Designer: Lina Menard of Niche Consulting LLC (yup, that's me!)
  • Builder: Lina Menard & Friends (I hosted work parties most weekends!)
  • Plan Set: To Be Released Soon
  • Number of Full-Time Inhabitants: 1
  • Number of Part-Time Inhabitants: 1
  • Pets: Raffi, 10 year old red Devon Rex tabby cat

Size Details

  • House Width (Exterior): 8'-4" (100")
  • House Width (Interior): 7'-4" (88") 
  • House Length (Exterior): 14'-9" (177")
  • House Length (Interior) = 13'-9" (165") 
  • Exterior Square Footage: 123
  • Interior Square Footage: 100
  • House Height: appox. 12'-6" 
  • Weight: Unknown

Construction Details

  • Style: Gypsy Wagon
  • Roof Shape: Vardo (curved)
  • Foundation Type: Single 5000 # Iron Eagle Vardo Trailer with side extensions, welded-on stabilizing jacks
  • Construction Type: SIPs (Structural Insulated Panels)
  • Insulation Type: EPS (expanded polystyrene foam)

Systems

  • electric point-of-use water heater
  • electric space heater (Oct-Mar)
  • mini-fridge without freezer (April-September)
  • one-burner induction cooktop
  • convection toaster oven
  • mini chest freezer 
  • kitchen sink
  • bathroom shower

Sustainability Features

  • salvaged door, windows, and finish materials
  • electric-only appliances
  • SIPs construction for energy-efficiency
  • liquid-applied water resistant barrier for air sealing and energy-efficiency
  • all LED lighting
  • energy-efficient appliances
  • low-VOC paints, stains and sealants

 Budget

  • Total Budget: $25,000
  • Total Build Cost: $24,250
  • Building Materials: $14,000
  • Car & Truck Rental: $2,750 (I don't own a car, so I rented cars and trucks for my build)
  • Build Space Rental: $2,250 ($250/month for 9 months)
  • Volunteer Meals: $1,500 (I ran work parties most weekends and provided coffee, continental breakfast, snacks, a picnic lunch and for those who stuck with me till the end, dinner!)
  • Furnishings: $1,500
  • Contracted Labor: $1,250 ($750 roofer, $300 welding for flip-up porch, $200 electrical consultation)
  • Appliances: $1,000
  • Estimated Sweat Equity: $16,000 (800 hours at $20/hour*)
  • Total Value: $40,250

My SIPs Wall Raising

Wall Raising Crew Yesterday we put the SIPs walls up for my gypsy wagon! My Tiny House Build Began last Friday when we picked up My Custom Vardo Trailer and started on Floorbox Lessons Learned. Then the Floorbox Continued because I was thwarted by supply issues and rain on Sunday. I also changed my mind (again) about my wall and floor attachment systems, eventually going back to Iteration #37 with Patrick’s help.

So yesterday morning I figured it would be a piece of cake to put the sill plates down in their proper place, stand the walls up, and get them secured. And it would have been – if the sill plates were in their proper place. It took us nearly 3 hours yesterday (in the drizzle) to get the sill plates just where they needed to go. Fortunately, I had a great crew of Tiny House Helpers: Patrick Sughrue of Structures NW, John Labovitz of Polymecca, Laura Klement, Deirdre, and Eric.

The trailer was square but the flanges were not, so when we measured off of them we came up with ¾” variation from front to back. I had already ordered my trailer when I decided to have SIPs made for me instead of trying to make them myself. If I had it to do over, I absolutely would have taken Patrick’s advice to do a SIP floor, too! That way we would have a perfectly square and 8-foot-wide starting point. The trick was Patrick’s idea of marking the centerline and working off of it – no matter what. Once we did, things came together really quickly. Patrick was an excellent crew leader, showing us how to install his panels properly.

We put sill seal down underneath the bottom bottom plate (a 2 x 6) and then sealed the top bottom plate (a 2 x 4) on top of it with Prosoco’s Joint & Seam, nailing the plates together as necessary to make them easier to work with. We secured the bottom plates to the trailer flanges with 4” long ¾” bolts and added self-tapping metal screws along the front and back of the trailer since there were only two bolt holes in each of the flanges which we could screw into for these sills. We did have to drill a couple more holes in the flanges and with a good bit this wasn’t horrible to do, so in the future I’d probably not have them pre-drilled by Iron Eagle Trailers.

Picnic in My New House

Once the sill plates were down it only took us an hour and a half to get the walls up! We lifted the panels, rotated them as necessary, and set the edge down on the trailer floor. Once we were lined up, we applied spray foam to the bottom plate and scooted the panel off the edge of the floor and into its proper place. Laura held the first wall in place while we got the second and third panels up, securing them together with long screws. We connected the two panels on the long walls with a spline, which we spray foamed on both sides and the bottom. The front panel was the only one that caused us any trouble and that was because we hadn’t quite gotten the two back end panels all the way to the back panel. That 1/8” matters! We used ratchet straps to pull them as tight as we could and chipped away a little bit of the sill plate at the front and then realized we were being held up by the bolts. So cut away a bit of the stud on each side of the SIP so that the front panel could nestle into its spot.

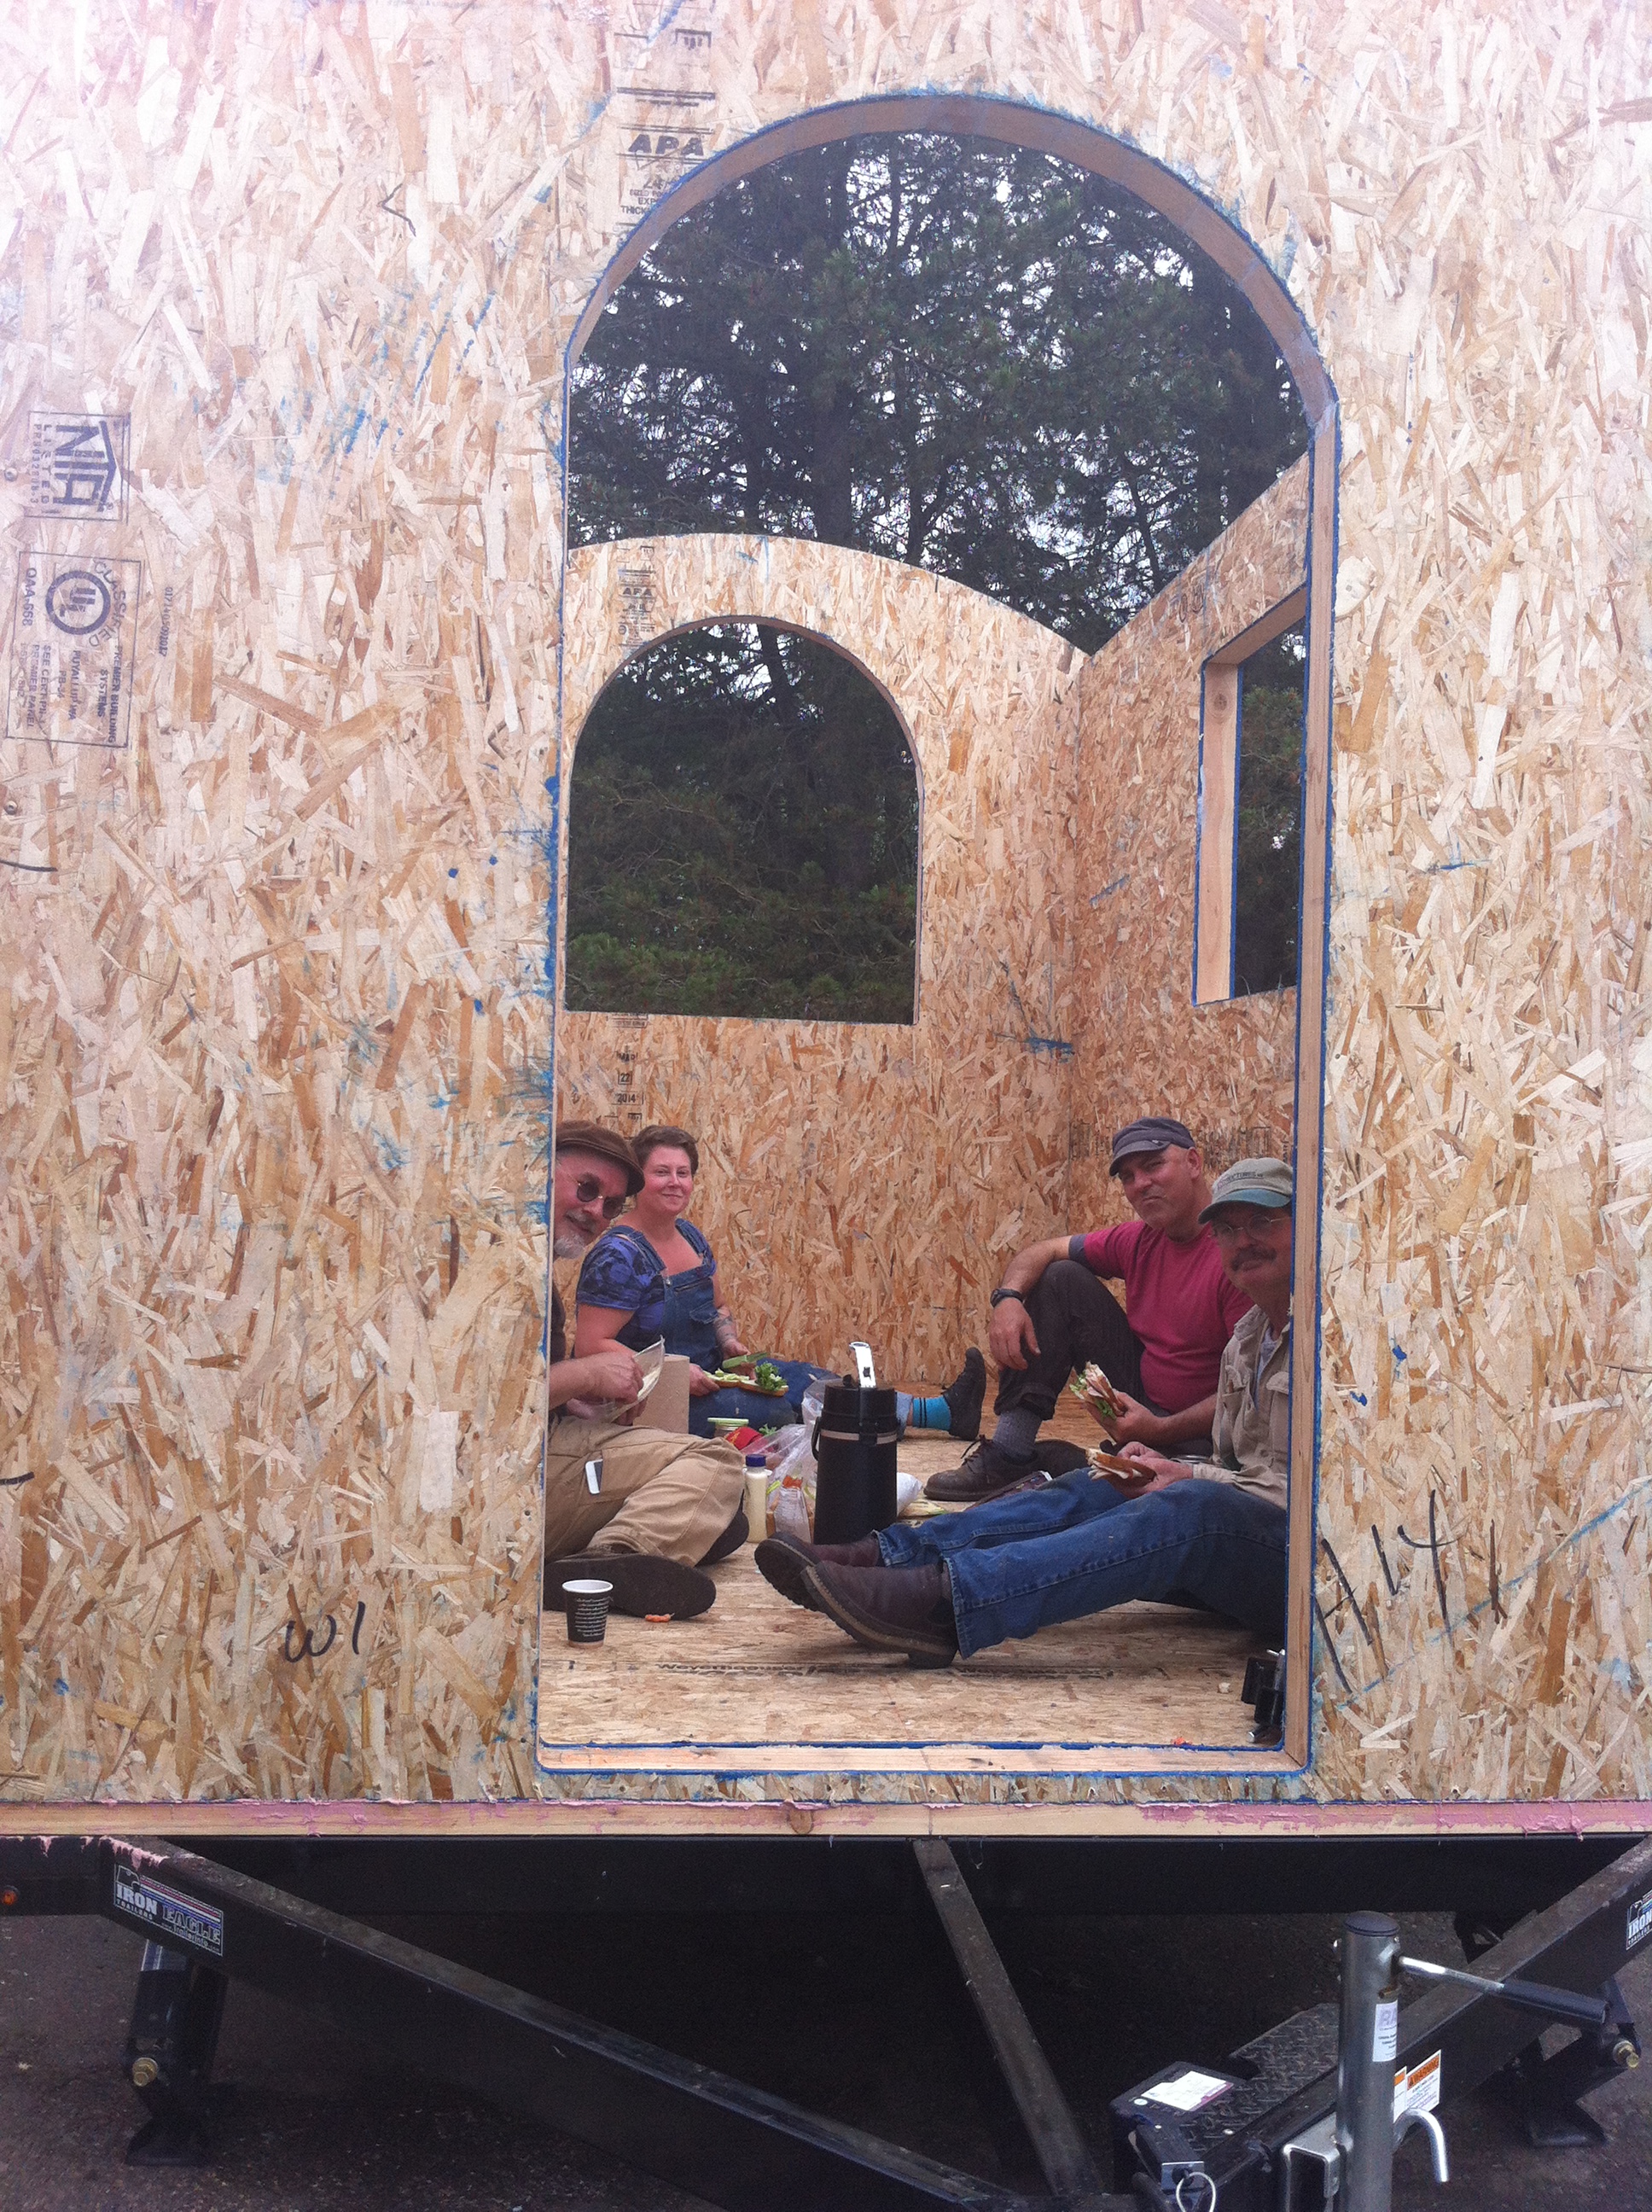
Hooray for four walls! We celebrated with a picnic lunch in the future kitchen of my tiny house!

Support The Lucky Penny

Lina cutting curved rafter tales Tonight I’m so excited I’m afraid I won’t be able to sleep. My Tiny House Build Began last Friday and tomorrow is My SIPs Wall Raising! Eep! By this time tomorrow I should have four walls up!

I am already thoroughly impressed by the way my community has rallied around me and my little house, The Lucky Penny. You have been cheering me on, sending me encouraging notes, making trips to the ReBuilding Center to boneyard materials, assisting with tiny house prep, listening while I noodle through design conundrums, oohing and ahhing over pictures of my door and sink, and offering to pitch in when the time comes to make it happen.

The time has come.

I’m ready to ask for your support. That may be moral support or financial support or it may be literally holding up my rafters while we get them in place. Any which way, I’ll take it!

It’s Memorial Day weekend and my build buddy Laura and I will be hosting work parties all four days. I’ve got a great line-up of Tiny House Helpers for this weekend. Here’s my grand plan:

Next weekend I’ll be leading a guided tour for Portland’s ADU Tour (and the following weekend I’ll be at a family reunion), but I plan to host tiny house work parties the weekends of June 14-15, June 21-22, and June 28-29. If you’re in Portland and would like to help, please contact me so we can arrange a time for you to come on out and pitch in!

If you’d like to contribute but you can’t make it out here to assist in person, please consider supporting The Lucky Penny in one of these ways:

Thank you, everyone! I am grateful for your support!

Naming My Tiny House: The Lucky Penny

this lucky penny tag photo is courtesy of a fun Etsy shop called MODpaw'd that makes pet tags (https://www.etsy.com/shop/MODPawed) Check out Lina's Tiny House: The Lucky Penny for a profile of my completed gypsy wagon!

I believe there is great power in naming and it's recently occurred to me that I haven't introduced my tiny house to you yet by name. Now, I recognize that sometimes it's best to wait until after a baby is born, a house is built, etc. to determine whether the name fits before announcing it, but in this case, it seems so right I'll take the chance. After all, I was telling everyone at the Tiny House Conference this past weekend! So I won't keep you wondering any longer. My tiny house is The Lucky Penny!

Here's why: My Tiny House Started with a Window I found for free four years ago, which inspired me to make the house a gypsy wagon with a curved vardo roof. A couple years later I picked up My Beautiful Arched Door at the ReBuilding Center. Then, since I'm a little superstitious, I quickly acquired A Sink for Good Measure. From there on out, it's been a Tiny House Treasure Hunt.

My tiny house's name came to me, as so many of my good ideas do, at three in the morning. As I thought about the curvy shape of the roof and the delightful coppery goodness of the sink, I realized that these character pieces were giving me a theme. My house is all about round and copper, so it seemed fitting to name it The Lucky Penny. (Anita wrote about my tiny house's naming earlier this week on TinyHomes.com in her post What's in a Tiny House Name?)

Copper CanistersI've found all sorts of confirmation that The Lucky Penny is the right name for my tiny house. Such as the fact that I've been the lucky recipient of several deals, donations, and discounts. And finding these charming copper canisters at an antique store after years of not finding any countertop containers that seemed just right. And a friend randomly sending me 25 DIY design ideas that use pennies. And then finding pennies all over the place since learning about penny tiling. (When I was a kid my little sister was forever finding pennies and I wasn't nearly as good at spotting them, so now every time I do I get a little thrill. And I stop to pick them up. I don't believe in unlucky pennies. I just believe the heads-up pennies are twice as lucky! Did I mention I'm strangely superstitious?!)

As I've been Budgeting for My Tiny House, I've realized that, like so many other wee abodes, my house will be quite expensive per square foot. I may well end up nicknaming my tiny house The Pretty Penny because chances are it will cost one! But for now I'll remain optimistic that my community will around my little house and the serendipity will continue so that The Lucky Penny continues to be the best name for my gypsy wagon.