


 Last weekend my Tiny House Helpers and I installed the bead board ceiling over My Arched Rafters, which I wrote about in Ceiling Up My Vardo. Then I realized that I'd need to come up with a new plan for the edge of the roof box. (Because my rafters are exposed, I'm having to build my ceiling, insulation, and sheathing from the bottom up!)
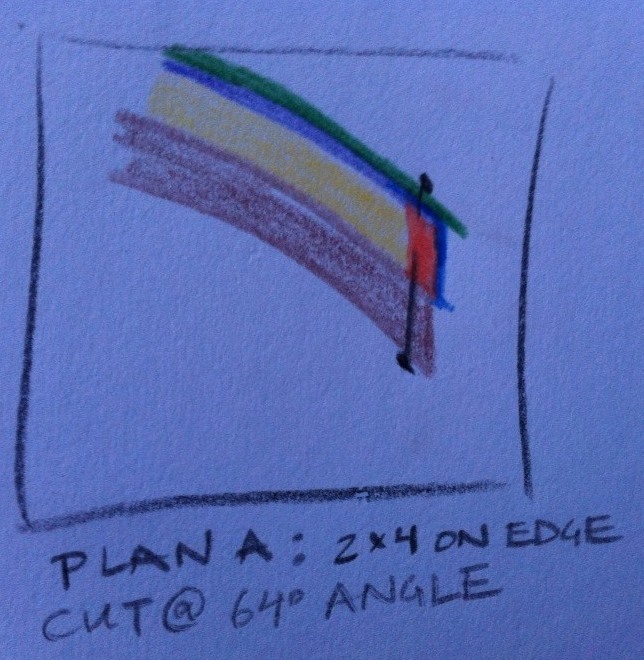
My plan for the roof box as I went into the build was to attach 2x4s on end at the edges of the eaves with 6" timber lock screws. I planned to rip the top and bottom at the correct angle (64 degrees) so that they'd sit on the Rafter Tails properly. The trouble was that I'd done my sketches before I cut my rafter tails. (The biggest trick to design I've learned is the ability to think 28 steps ahead! I'm working on it!) Once we'd finished Ceiling Up My Vardo, I realized that it wasn't going to work to put 2x4s on end at the tips of the rafters.

By the way, in these little thumbnail sketches, brown is the rafter, yellow is rigid foam insulation, purple is plywood sheathing, blue is flashing, and green is roofing. The orange on the first one is the 2 x 4 on edge.
So Plan B was to install a piece of normal L shaped flashing at the eaves to catch the insulation. I figured with enough finagling, the flashing could be bent up to the proper angle so that it would be vertical. When the metal roofing goes on another piece of flashing would cover up the top of the L-shaped piece before the roof panels went on.

But then it occurred to me that if I had an eave cap shaped like a U the sheathing could be tucked underneath as well. That seam could be flashed with the Fast Flash from the Prosoco R-Guard system. (Read My Tiny House Air Barrier for more on that!) So that was Plan C. However, It wouldn't work for these U-shaped eve caps to stick out without being bent up to vertical because I'm building my eves to 10' so I can still move my house with a trip permit. I don't have enough wiggle room to have the roof box extend out any further. And I knew it would be tricker to bend a U than an L.
So I decided it would be nice to have an eve cap that was already bent to my specifications. It would look much tidier but it would also be easier. So Plan D emerged. Laura and I noodled through the 7th grade geometry and determined that I needed a 64 degree angle at the bottom and a 116 degree angle at the top. The pieces needed to be 2 1/2" long on the bottom to catch the beadboard and 3 1/2" tall to accommodate 3" of insulation and the 1/2" plywood.

I asked around and everyone told me the place to go is Vinje & Son's Custom Sheet Metal. Vinje's is a great local family-owned sheet metal company that works with lots of do-it-yourselfers on jobs both big and small. I called them up and they said it wouldn't be a problem at all to create just what I envisioned. So I enlisted them to help with Plan D. When I got there we sketched out what I needed and they put my order into the manufacturing queue. They fabricated four 10' long eve caps that I could piece together to make a 16 foot length. I placed my order on Wednesday morning and the pieces were ready for pick up on Thursday. Their staff was friendly and knowledgeable and I'm sure I'll be back again soon whether it's for the Lucky Penny or another project.
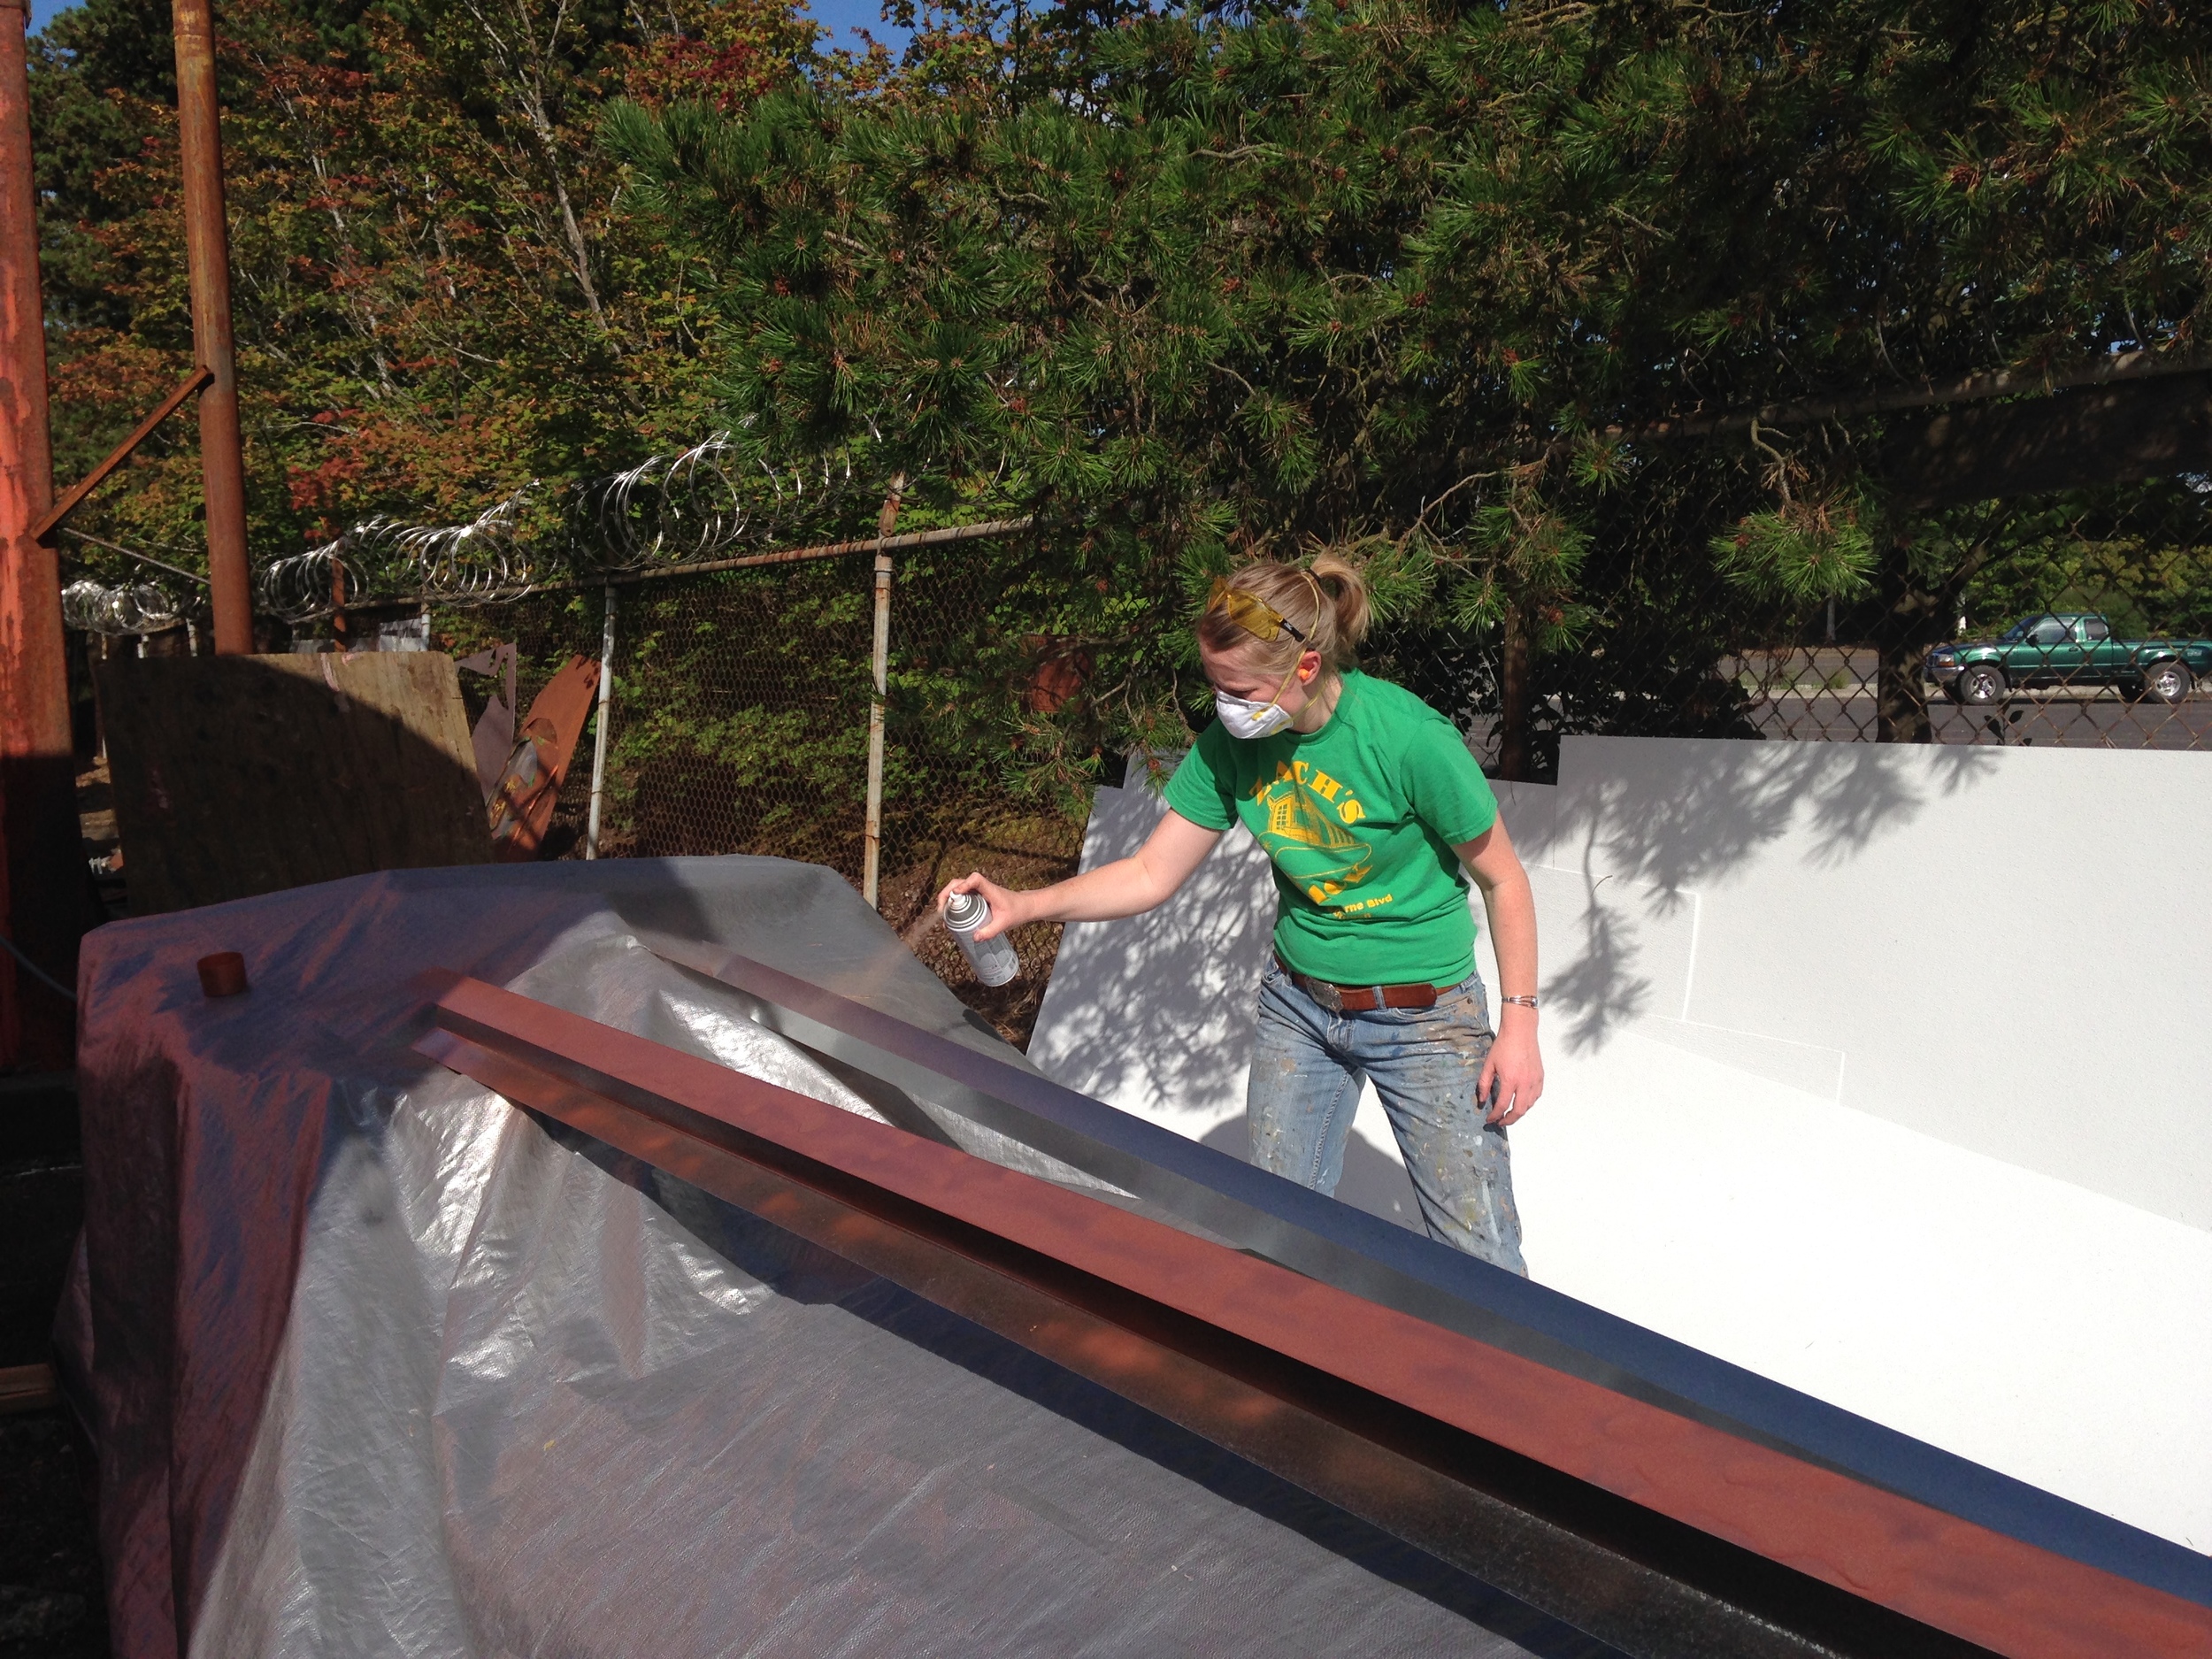
I was planning to pick up the eave caps in the morning and get to work, but it was raining (again!), so I spent my morning working at the Breathe Building and doing errands. This evening it had cleared up so my friend Amy helped me pick up the flashing pieces and spray paint the bottoms copper. The other portions won't be seen, but the copper colored eave cap will be visible between the rafters. (By the way, I'd asked the fellow at Vinje's about copper while I was placing my order, but it would have been a couple hundred dollars instead of $60! So I'm fine with faux copper.)

Amy and I also sealed up the joints around the rafters with Joint & Seam and the blocking with Fast Flash from the R-Guard system by Prosoco. (You can read all about that in My Tiny House Air Barrier.)
Tomorrow the plan is to install the eave caps at the ends of the wall and slip the insulation inside. Hopefully we can sheathe the roof on Sunday and I'll add the air barrier on Monday. Then I won't have to tarp anymore. Hip, hip, hooray!