November Tiny House Mixer Draws A Crowd

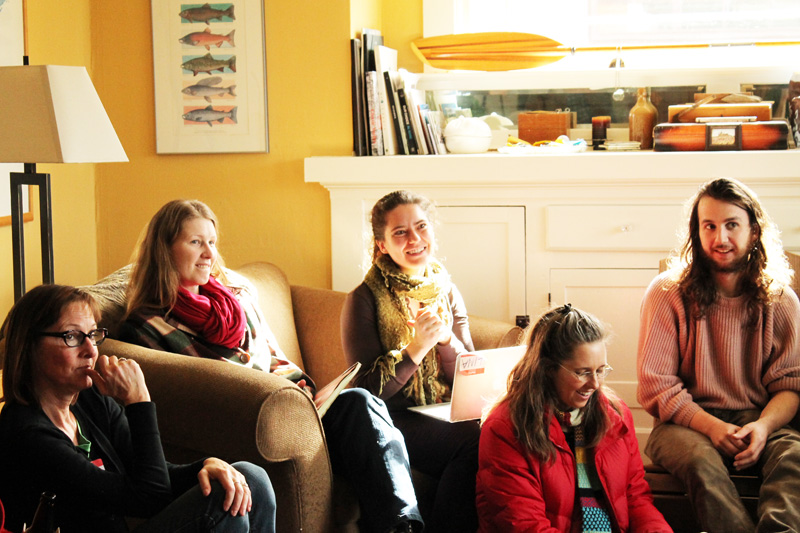
Forty-four people crowded around tables into the back room at the Lucky Labrador Brewing Company in SE Portland on Saturday evening so we could mix and mingle with other tiny house enthusiasts. Portland Alternative Dwellings hosted the Tiny House Mixer at the end of Day 1 of the November Tiny House Basics Workshop. We're working on booking a bigger venue for the December Tiny House Mixer! To hear about the next event, like the PAD Tiny Houses facebook page.

The Mixer started out with a welcome from Joan Grimm and Dee Williams of PAD, followed by a short program in which eight people had 2 minutes to share their tiny house story. Nathan Miller of All Ways Electric talked about electrical considerations, Derin Williams of Shelter Wise shared info about the tiny houses on wheels he's built, and Deb Delman and Kol Peterson gave an update on Caravan - The Tiny House Hotel (and coupons for tiny house enthusiasts to use for a staycation! Thanks Kol and Deb!) Then Tony talked about lessons learned since he began building his tiny house three months ago (he encouraged us to heed the warning about the spontaneous combustion potential of oily rags!), Ben described how his design evolved once he started Ben Builds a Tiny House at ADX in September, and Audrey and Tomas of Trying on Tiny shared their lessons learned from living in a tiny house for a year. There were a few good-of-the order announcements about new projects and available materials. If anyone knows of a good parking spot for Lynda and her tiny house, please contact her by email or phone (503-623-7898)!

Afterwards, people got acquainted by sharing their tiny house inspirations and design ideas. It was a treat to meet so many fascinating people, including Todd who's having his tiny house built by Abel Zimmerman of Zyl Vardos this spring and Chris of Builder by Bike whose tiny house I just happened upon a few days ago.

The tiny house community is growing by leaps and bounds and it's so exciting to be part of it. See you at the December Tiny House Mixer! Day and location TBA. Stay tuned!

What My 200 Things Challenge Taught Me

02 Lina & Stuff A package arrived in the mail yesterday and I added two new items to my possessions without adding them to my inventory. I haven’t been counting since my last inventory of my possessions, when I moved into my Home, Sweet Pea in August with 190 things. But receiving that package reminded me that I’ve learned a lot about my relationship with stuff since I embarked upon an adventure in radical downsizing two years ago.

I’ve found that My 200 Things Challenge has made me a better minimalist. I am less attached to my possessions, but more pleased with the things with which I surround myself. I am more likely to loan something out. I am less worried about wearing something out because there’s a new excitement about acquiring something new. I am more likely to decorate with fresh flowers or fall squash. I only wear clothing that I feel comfortable in. I own few possessions that I don’t use on a daily, weekly, or at least monthly basis. I don’t have to shuffle things around as much to get to the other things I need. I no longer own things that frustrate me because they are broken because I have repaired, replaced, or purged them. I am more particular about what I allow into my home, which means I no longer take something just because it was free. I am more likely to consider whether or not I really need something before I acquire it. I am more likely to get rid of something I’m waffling about. But most importantly, I give less attention to my stuff and more attention to my experiences. If this sounds good to you, please note that I will be teaching a workshop on downsizing and decluttering in Portland, OR in November and December. I encourage you to contact me if you'd like to sign up!

serving dinner for six in a tiny house

I had heard about the 100 Thing Challenge several months before my move to a 12 foot diameter yurt and I realized it was a whole different way of looking at what I owned. When I began my downsizing process the year before my focus was mostly on volume. As I shrunk my footprint from an 800 square foot 2-bedroom house to a tiny house on wheels called Bayside Bungalow, the question I kept asking myself was “Can I fit this into the tiny house?” I was amazed at how much I was able to fit into a tiny house on wheels. The house fit me and all my stuff because I lean on the density side of the Packing Lightly vs. Packing Densely scale. But it wasn't just stuff. I discovered the Tiny House Sleeps 5 Comfortably and I did plenty of Entertaining in the Tiny House.

So, when I first heard about it, the 100 Thing Challenge, like tiny homes themselves, seemed too radical for me. But, just as I started wondering what it would be like to live in a tiny house once I learned about Dee Williams and her little house, once I learned about A Guy Named Dave and his 100 Thing Challenge it captured my curiosity. I found myself wondering if this thing I was holding/using/fixing would be one of my 100 things. So I read more on Dave’s website and then read his book on my kindle. (My favorite part is when Dave talks about how we tend to own several of something and none of them are just right.) As I read up, I realized that Dave had crafted his own rules about how he would count his possessions and some of them seemed were pretty lax. For instance, although Dave limited himself to one really nice pen, he counted as just one thing his library. On the other hand, my friend and tiny house dweller Tammy Strobel counted her camera and its two lenses as three separate things on her list as she downsized to 72 Things! I realized I would be more willing to hold myself accountable if I made up my own rules, so I jotted them down in My Things Challenge: Who’s Counting Anyway?

Home Sweet Yurt

I moved into the yurt with 198 Things. Instead of just asking myself if something would fit the space, I started asking myself if it fit my life. Was it worth counting? There was a patch last winter when I was Taking Stock Without Stocking Up since my New Year’s Re-Inventory revealed that I had “slipped” to 214 things. I combed through my possessions and purged some things, dipping to 197 and then adding 6 more when I went in search of The Minimalists New Clothes. But since I couldn’t figure out what else to part with, I decided that it was okay to have 203 things. It was right around that time that I realized the number wasn’t so important. What was more important was that I’d gotten the intent of the challenge. I’d downsized till I just couldn’t figure out what else to get rid of. Then I lived with those items to see how it felt. When I did my inventory during a bout of Perfect Packing Weather in August I had just 190 things! So I ended My 200 Things Challenge with fewer things than I’d started it with, which I considered quite a good sign.

I’ve decided that for now I’m not going to track my possessions. I’ll devote that time and energy to other efforts. But I’m so glad I took on My 200 Things Challenge and I’m grateful for all it taught me.

PAD Tiny House Basics November 2-3, 2013

This time next week we'll be in the midst of the November Portland Alternative Dwellings Tiny House Basics Workshop. If you'd like to join in on the tiny house fun, please come to our Tiny House Mixer on Saturday, November 2 from 5:30-7:30pm at Lucky Lab on SE Hawthorne. I've had the opportunity to work with Dee Williams and Joan Grimm for five of these workshops now and I'm excited to meet a new batch of tiny house enthusiasts. PAD's Tiny House Basics is a 2-day workshop which covers all the considerations for someone looking to build a tiny home or have one designed and built for them.

In addition to discussing considerations like road legal limits and the house to trailer connection, we also address the invisible structures - the legal, financial, and social systems that accompany the decision to embrace the Little Life. We'll be talking about fire safety, structural mechanics, moisture management, zoning and building code, and how to create community.

Past workshops have included upwards of 50 people, but this one is going to be a more intimate workshop with around a dozen people, so we should have a good chance to learn about the workshop participants' tiny dreams. As always, it will be fun to help connect them with inspiration, information, and resources to help them move forward along their tiny house journey.

Tiny Chair Workshop at ADX in Portland, OR

On Saturday, October 26th I'll be teaching a Tiny Chair Workshop at ADX in Portland, OR. This is a Portland Alternative Dwellings workshop intended as a fun introduction to carpentry. Start small by building yourself a simple, comfortable tiny chair. In this 1-day workshop, you’ll learn how to safely use basic power and hand tools. You’ll head home with your very own tiny chair and the confidence to tackle the next project. The class has limited space, so sign up pronto on the ADX website!

"What is a tiny chair?" you ask. A tiny chair is a sweet little wooden and canvas chair that can be folded into itself and tucked away - or hung on the wall as a piece of art - how's that for turniture?! (I should also mention, as we head into the holiday season, that the chair would be a great gift for someone who is living light and the class itself would be a fun present for someone who is minimizing!)

"And where and what is this ADX place?" you wonder. ADX is a fabulous non-profit located in Portland's Central Eastside that is "building a community of thinkers and makers." They have a complete woodshop where we will be constructing our little chairs.

ADX is also where PAD Grad Ben is building his tiny house on wheels! You can follow along at Ben Builds a Tiny House. Ben attended the Pedalapalooza Tiny House Bike Tour and participated in the PAD building workshop for the Naj Haus Wall Raising. He's now raised the walls on his own little house. Once you've taken the Tiny Chair Workshop you'll be ready to lend a hand to Ben and other tiny house builders to get more hands-on experience before tackling your own tiny house build!

Day 12: Tiny House Presentations

Yesterday we wrapped up Yestermorrow's 2013 Tiny House Design-Build with final presentations from 13 brilliant students. (See more photos in the Day 12 Slideshow.)

It's amazing to think that less than two weeks ago we were perfect strangers, introducing ourselves and our partis. There were many different reasons people shared for selecting Yestermorrow's Tiny House Design-Build course and today we were able to watch as 13 people shared how their thinking has changed as they've had the opportunity to learn about tiny house design considerations and build the shell of a tiny house on wheels.

Today we saw clever space-efficient design solutions presented through beautiful drawings and detailed models. We got to learn about:

  • Cate's gypsy wagon with an arched roof, full extension drawers, leaded glass windows, and a multi-purpose mud room

  • Julien's tiny home on wheels for a family of four, complete with a cow catcher, a movie screen, an electronic keyboard, and a set of brilliant cube turniture that serves as seats, storage, and a guest bed
  • Amanda's backyard retreat, nestled into an edible landscape with a private outdoor seating area and sunset views
  • Ben's cabin in the woods of the Olympic Peninsula with a great porch for sitting and a woodshop for projects that is as elegantly simple as the Stanley hand planer that inspired it
  • Annika's little backpack-inspired house with a place for everything and so much more: a garage door opening to a courtyard, a greenhouse for food production and passive solar heat gain, a cozy loft, and easy access to fresh cookies when one walks in the front door
  • Apayo's boat-shaped guest house in an incredible landscape, which serves as a canvas for her ocean-insipred art and a retreat for her visitors

  • Oliver's multi-story house with a top-floor kitchen equipped with a dumbwaiter and windows that march up the corner of the house in step with the spiral staircase
  • Laura's tiny house on wheels with a clerestory providing light for the loft and a multi-functional furniture to maximize the space
  • Evan's little house on wheels with a clever central storage solution to ensure that everything has its place so that the house fits Evan juuust right
  • Whitney's tiny house with a soaring garage door that enables the house to serve her differently for each of Vermont's 6 seasons (spring, summer, foliage season, stick season, winter, and mud season)
  • Julie's Japanese-teahouse-inspired mobile home, complete with tatami mats, shoji screens, a table that serves as artwork, and a circular window
  • OJ's mobile design-build classroom that deploys like the tape measure that inspired it, opening to create more working space for projects while also serving as a crash pad for the instructor while traveling

  • Jonathan's not-so-tiny but super cool home in the clearing with 27 instances of the magical Number 27 hidden amongst stained glass windows, a stone fireplace, a secret passageway, a breakfast nook, and several cozy sitting spots

Everyone should be immensely proud of the work they've produced. Their ideas, insight, and imagination have been thoroughly inspiring. I can't wait to see some of these little houses become a reality in the next couple years. Three cheers for Yestermorrow's 2013 Tiny House Design-Build course!

Day 11: Roof Sheathing & Drawing Sets

Day 11 of Yestermorrow's Tiny House Design-Build course was our last building day since presentations will take place all day today. So most of us worked in the Hanger this morning and a handful of us were back there this afternoon so that we could finish up as much of the roof sheathing as possible. Meanwhile, the studio was abuzz with model making and drawing as everyone refined their work for their final presentations. (See more photos in the Day 11 Slideshow.)

Down in the Hanger, Laura and Lizabeth worked out the sheathing for the gable ends and got them buttoned up. Whitney laid the floor of the storage loft. OJ, Laura, and Annika attached the hurricane ties which connect the rafters to the walls. Cate cut additional sheathing and did a happy dance when Patti complained she couldn't figure out which side was the factory edge. Whitney, Patti, and I clambered around on the scaffolding, attaching sheathing to the rafters and getting those last rake rafters for the dormers secured in place.

With two weeks of working together under our (tool) belts, it was awesome to see how productive we were all able to be! Hooray for teamwork! At the end of the work day we all gathered up for a group photo.

Back in the studio in the evening everyone hunkered down at their drawing tables to pull their work together. It's been incredible watching everyone's designs evolve and there are so many downright brilliant ideas I am completely inspired all over again! As people piled up their drawings in neat little stacks and switched off their desk lamps they found their way down to the bonfire where we munched on goldfish crackers and burned the scrap wood we'd produced over the past two weeks of building.

I can't wait to see the presentations today. The anticipation makes this feel like Christmas morning!

Day 10: A Sprig for the Last Rafter

Most of Day 10 of Yestermorrow's Tiny House Design-Build course was dedicated to building so that we could get the rest of the roof rafters up. However, there were also a group of students who hunkered down in the studio to get farther along on their models and drawing sets. I enjoyed spending time in both places as the work progresses. (See more photos in the Day 10 Slideshow.)

Because the house has dormers in the center there are two different pitches. So we created rafters with two different slopes. Both sets of rafters meet at the ridge beam and rest on the walls (at two different heights) with bird's mouth cuts. The rake rafters for the dormers will need to wait until we've sheathed the roof sections on either side, but the house is definitely taking shape.

We managed to get the last of the common rafters up before supper and we had a little "topping out" celebration as we attached a sprig to it. Lizabeth explained that in the Druidic tradition a sprig was attached to the last rafter as a thank you to the trees for contributing to the house. This tradition has continued among timberframers here in America and it continues now on Day's little house. Hooray!

Day 9: Rafters, Ridge Beams & Jam Night

Patti started Day 9 of Yestermorrow's Tiny House Design-Build course with a presentation on roof framing. The tiny house on wheels we are building includes dormers in the center of the building, so we are cutting our rafters at two different pitches. Patti walked everyone through the vocabulary and structural mechanics of roof framing with models and diagrams. Then she demonstrated how to use a framing square to make bird's mouth cuts on the rafters. (See more photos in the Day 9 Slideshow.)


Down at the hanger we split into teams so we could square up the walls, build supports for the ridge beam, sheathe around the wheel walls, and begin cutting our rafters. The morning flew by and soon it was lunchtime. (I have resisted bragging about the incredible whole foods meal plan here, but let me assure you that the food is scrumptious at every meal!) I took the afternoon off from construction to have a nap and check in with Yestermorrow's office team. By the time I went down to the hanger the ridge beam was in place and most of the rafters were already up!

Since we only have two more days of design work the evening was devoted to studio time so everyone could work on their tiny house designs. However, most of them took breaks to join the festivities in Yestermorrow's dining room. It was a crisp evening, perfect for a jam night in the kitchen, accompanied by Cillian's famous popcorn and the ever-popular Heady Topper from local brewery, The Alchemist. The brew was courtesy of the tiny home's owner Day Benedict, who is a former Yestermorrow Intern. He came to meet everyone and see his little house. It was fun to get to know him and learn more about his plans for the tiny house. Between Dave Warren, Yestermorrow's Facilities Manager, and my co-instructor Patti we had a stand up bass and two guitars. We scrounged up some copies of Rise Up Singing and most of us sang along at some point to some good old folk songs (including one of my favorites: I'm My Own Grandpa). What a fun night!

Day 8: Walls, Windows & Models

On day 8 of Yestermorrow's Tiny House Design-Build course we spent our morning on the job site getting the rest of the walls raised. A couple people have been especially enjoying the design portion of the class so they've hunkered down in the studio to learn more about how their buildings work by building models and drawing up sections and elevations. (See more photos in the Day 8 Slideshow.)

The center sections of the wall are taller because we've done a balloon frame in the area where the dormers will be, so these wall sections are quite heavy. We've braced each of the walls up in place while we square the walls and attached them to each other. Yesterday when we were sheathing we cut out most of the window openings using the circular saw to make plunge cuts. (The trick here is to drill a hole in each corner from the inside of the wall so that you can see the starting and stopping points for your cut.) However, we didn't get all the windows cut out so Julien tackled the rest today with a reciprocating saw once the walls were up. It's messier work, but definitely satisfying to see those windows pop open!

Meanwhile, Laura figured out a plan for blocking out around the wheel wells with pressure treated 2x6s so that we would have a surface to which we can nail our sheathing. It took some head scratching, just as it did on Day 4 of the Tiny Barn building blitz.

After supper Paul gave one last slideshow about proportion, line, and color. Then everyone got back to work on their own tiny house designs in the studio. The models are shaping up nicely and many people have glued a copy of their floor plans to the models which makes them easier to understand. It's so fun to see the houses people have described start to take shape.

Day 6: Sheathing, Energy & Systems, Wall Raising

On Day 6 of Yestermorrow's Tiny House Design-Build we began sheathing the walls with CDX plywood. We're sheathing the walls flat so that the plywood creates sheer panels, which helps to keep the walls square while we install them. (See more photos in the Day 6 Slideshow.)

Since the long walls are being built in 3 sections and we have plenty of brute strength amongst the 16 of us, the panels won't be too heavy to lift into place even once they are sheathed. We decided to use 3/8" plywood to save weight since other tiny housers have done this. Unfortunately, the plywood has more warps and bows than we'd like to see so most of us have decided we'd rather use 1/2" for our little homes. (It may be that 3/8" plywood is higher quality on the Best Coast and this is another East Coast - West Coast difference.)

Now that we have the trailer level we can use it as a work surface. Our wall sheathing process involves snapping a straight line 3 1/2" from the edge of the trailer, toenailing the bottom plate of the wall to the subfloor along this line, squaring up the wall, and attaching the plywood, using the glue and screw method. Because this little house is not built down into the trailer frame we are running our plywood an extra 4 3/4" below the bottom plate so that it will cover the floor system (3/4" AvanTech subfloor, 3 1/2" pressure treated joists, and 1/2" pressure treated undercarriage). We also cut out most of the windows, using a circular saw to make plunge cuts. The windows we didn't manage to get cut out before it was time for wall raising will need to be finished with a reciprocating saw.

We got the walls almost ready to raise in the morning and after lunch I did a presentation on building science basics, energy, and systems. Afterwards we did our first wall raising and got three of the wall sections up. It's always such a thrill to see the first walls go up!

Thankfully, we set up the schedule with a 24 hour break from Saturday evening to Sunday evening, which will be a good chance for everyone to recharge. Perfect for a Saturday evening bonfire and a sing-along with a few (handmade!) instruments. It was an action-packed week and we've got another one ahead of us!